Picture this. You make one of the best batches of snickerdoodles you’ve ever made. You save the recipe link so that you can make them again. When you come back to make more, the link is broken and you’re taken to a website full of coupons but void of cookies. Gone is the recipe, and your snickerdoodle dream is crushed.
I wish that was a hypothetical story, but it definitely happened to me. In response, I decided to be more careful about saving recipe links and storing the ones that I love. Even though a written recipe can’t get lost due to a broken link, I couldn’t imagine how heartbroken I would feel if an heirloom recipe card got lost or ruined with no one to remember it by.
No matter if you choose to use a method similar to mine or not, let this be a kickstart for you to make sure you have your favorite recipes stored safely.
My system is a simple “Recipes” folder in Google Drive. One cool thing about using Google Drive is that you can easily share the folder with others. My mom, mother-in-law, and husband all have access to mine. You can choose to allow people permissions to view only, add comments, or edit as well. Another helpful thing about using Google Drive is being able to search for ingredients when choosing a recipe. If you have cauliflower to use, you can search for “cauliflower” in the search bar, and all of your recipes that call for cauliflower will pop up. I use this feature a lot when I’m running low on food and have to get creative with the ingredients that I have, and I also search for Instant Pot quite frequently too.
Here’s how I have mine organized:
Step 1: Set up a folder in Google Drive.
Step 2: Create subfolders for organization.
This helps to make sifting through recipes easier when trying to choose what to make. For larger recipe collections, more specific folders would be helpful: soups, breakfast, slow cooker, side dishes, sauces, vegetables, etc. You can start with a couple and add more as you see fit.

Step 3: Within the subfolders, create a document for each recipe.
- Include any information that you would need if you didn’t have the original recipe source to refer back to. The ingredient and instruction lists are mission critical, but you could also add any other available information that you’d like such as nutritional values or helpful photos. If the recipe is online, copying and pasting makes this easy. You can always change the font size and color if you’d like. For all other recipes, e.g handwritten or printed, taking and uploading pictures of them is helpful. Otherwise, you’d have to type it all in.
- Tip: Some websites don’t copy and paste well, especially if there are lots of advertisements or fancy formatting. In those cases, I usually have better luck if I pull up the printable version and copy that.
- Note where the recipe came from. Include links for online recipes, or add the author for any physical ones. Even though I have the information already in front of me, sometimes I like to go back to the original recipe posts to read the reviews. It’s also nice to have the link to share with others.
- Tip: For recipes that come from bloggers like me, open any links when you make one of their recipes and give them a quick view. It’s an easy way to support someone!
- Add your own recipe notes.
- Make note if you substituted an ingredient, added more or less of something, simmered or baked for a different amount of time, skipped a step, etc. This is one of the best perks of this system, because even when recipes come from others, they start to feel more individual to you once you start adding your tweaks. I like to write my notes in line with the original recipe but in a different color so that it stands out.
- Add helpful pictures
- Pictures from the original recipes are oftentimes perfect and look different than your own final product. I like to add a picture (if I have one) either instead of or next to what a recipe is supposed to look like. You can also add any process pictures for tricky recipes if that would help you in the future.
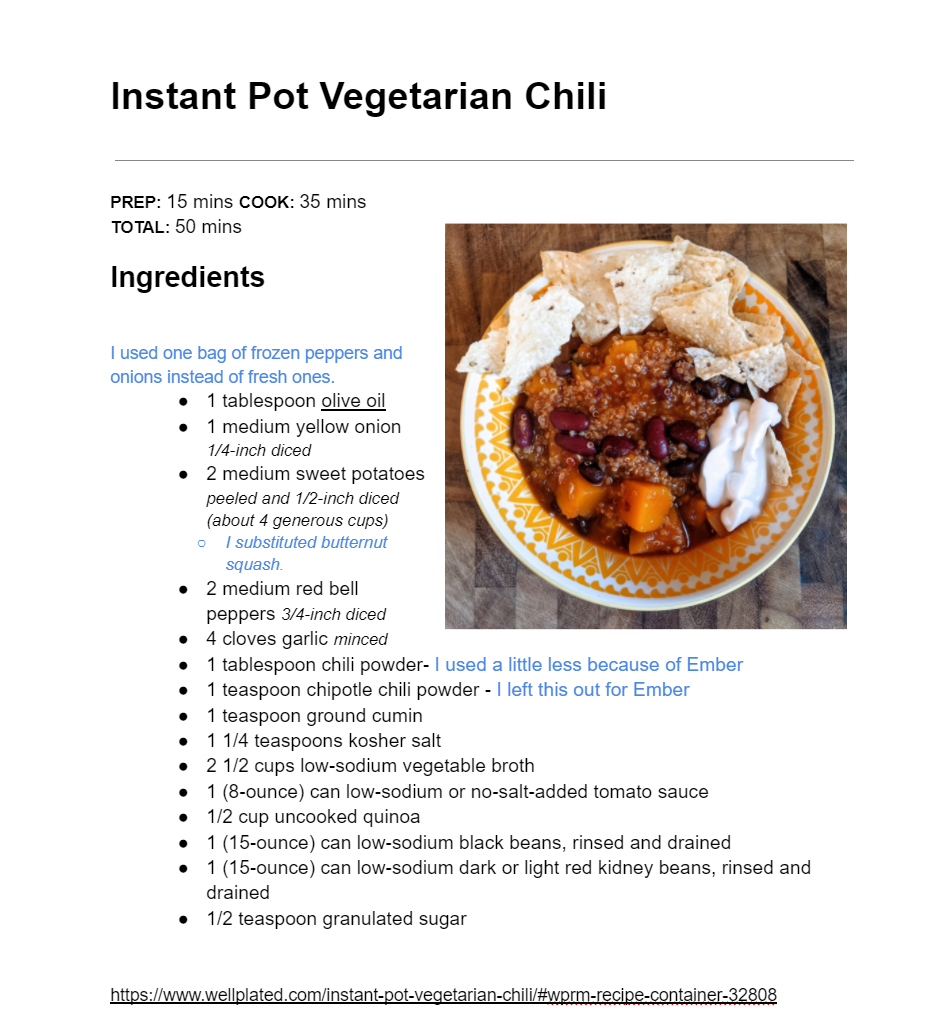
Here is an example of a savory recipe found online by Well Plated by Erin. The blue writing is my notes, and the picture is my recreation.
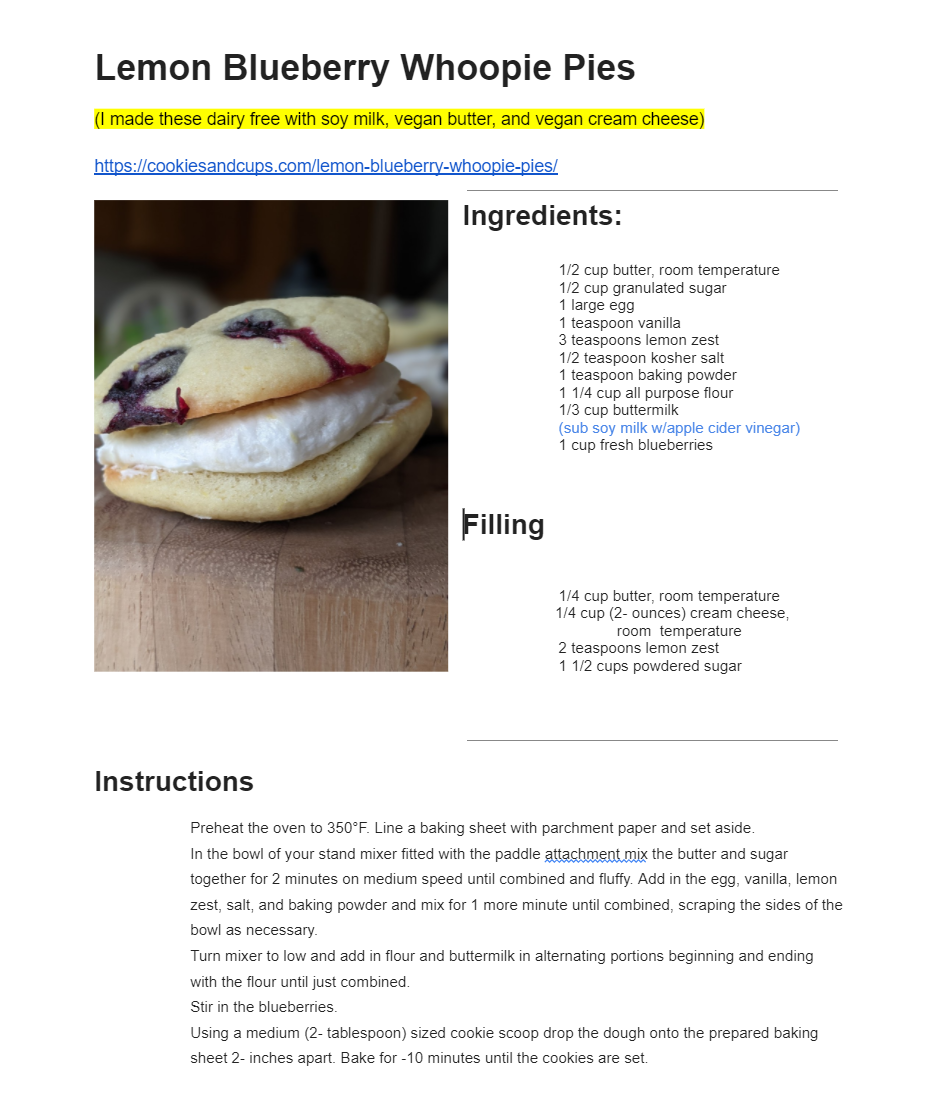
Here is an example of the first page of a dessert recipe that I found online by Cookies & Cups. I added the blue writing, photo, and highlighted words.
Step 4: Create a page in the original “Recipes” folder to store recipes to try in the future.
If you find three delicious looking recipes when you only need one, store them here for later to cut down on browsing time.
Step 5: Add anything you think is helpful.
At the end of the day, this folder is like your own perfect cookbook and kitchen guide. If you want a page on what ingredient substitutions you like best, add it. If you want a page for failed recipes and what you learned from them, do it!
Truthfully, I should get in the habit of adding each recipe once I discover it was a success so that I don’t give my husband heart palpitations over how many tabs I have open. It doesn’t bother me at all, but he gets stressed out for me when I have 40 tabs between my laptop and phone (I often keep recipes pulled up that I want to make too).
As I said before, even if you don’t use anything from this post, let it stand as a reminder to double check that your recipes are stored safely. If you do adopt a method similar to mine, let me know!
On a different note, I am feeling inspired to try and upload a blog every Sunday. My post ideas are fairly varied between food, motherhood, and life updates; however, that’s just my life. I hope there is a little something for everyone.
Have a wonderful week!
I’m so impressed with your organizational skills!
Thanks! It definitely saves me time in the long run.